February 26, 2025
[How to photograph the moon] Tips for capturing the moon in a beautiful and attractive way
[How to photograph the moon] Tips for capturing the moon in a beautiful and attractive way
![[How to photograph the moon] Tips for capturing the moon in a beautiful and attractive way](/global/consumer/article_file/file/article-how-to-take-photos-of-the-moon-en/01-en.webp "[How to photograph the moon] Tips for capturing the moon in a beautiful and attractive way")
The moon, shining large in the night sky, is a particularly beautiful entity and fascinates people. Many people may have started using an interchangeable lens camera because of moon photos. However, when it comes time to try taking pictures of the moon, it is sometimes difficult to capture the desired image because the image may be smaller than expected or blurred. On the other hand, by choosing the right lens and following the tips for interchangeable lens camera settings, even beginners can take beautiful moon photos.
In this article, we will explain the techniques for capturing the moon as you want it in an easy-to-understand way for beginners.
Can the moon be photographed with a smartphone?
To begin with, I would like to ask the question, “Isn't it possible to photograph the moon with a smart phone?” I think some people may ask the question, “Is it possible to take pictures of the moon with a smartphone? The camera performance of smartphones has been improving year by year, and with the right settings and dedicated apps, it is possible to take pictures of the moon.
However, the sensor size of a smartphone camera is smaller than that of an interchangeable lens camera, and the brightness and telephoto capability of the lens are limited, so the photos tend to be rough and blurry. To capture the moon's outline and surface in large, detailed images, an interchangeable lens camera and a suitable lens are essential.
Things useful for photographing the moon
To take beautiful pictures of the moon, you will need a telephoto lens. There are also several items that you should have. Here we introduce some useful equipment for photographing the moon.
Telephoto lens (Ultra-telephoto lens)
A telephoto lens with a long focal length is necessary for moon photography. A telephoto lens with a focal length of about 200 to 300 mm (or an ultra-telephoto lens with a focal length of 300 mm or more) will be able to capture the Moon's surface and craters.
However, since a typical telephoto lens will not be able to capture the moon in the entire image, you will need to crop the image after shooting. If you want to capture the moon without cropping, you will need an ultra-telephoto lens with a focal length of about 600 mm or more.
Teleconverter
A teleconverter is an accessory that extends the focal length of a telephoto lens. As mentioned above, a lens with a very long focal length is necessary to capture the moon filling the entire image, but such ultra-telephoto lenses are generally expensive and not readily available.
By attaching a teleconverter to an ordinary telephoto lens or a hand-held telephoto lens, you can extend the focal length and enjoy more serious moon photography. However, not all cameras and lenses are compatible with teleconverters. In addition, using a teleconverter may increase the maximum aperture f-number of the lens and slow down the autofocusing speed, so it is important to check the specifications of the camera and lens in advance and adjust the settings accordingly when shooting.
Tripod and release
When photographing the moon, it is important to minimize camera shake. Camera shake is especially likely to occur when shooting a large image of the moon or when shooting a crescent moon, where the shutter speed is slower. For this reason, a tripod is recommended for stable shooting.
Also, using a wireless or cable release is effective in reducing blurring when pressing the shutter release. If you do not have a release, you can use the camera's self-timer function instead.
Setting up the main body of an interchangeable lens camera
The settings of the camera body are also important for taking beautiful pictures of the moon. Here, we will explain the settings of an interchangeable lens camera suitable for moon photography.
Shooting Mode
Use manual mode when shooting the moon. If you use aperture priority mode or shutter priority mode, in which the camera automatically determines the exposure, the moon will easily become blown out and it will be difficult to adjust the exposure.
If you are not used to shooting in manual mode, it may seem difficult, but as explained below, the general values are fixed to some extent, so use them as a reference for your settings.
F-number (aperture value)
Generally, the F-number is reduced for nighttime photography, but since the moon is a bright enough subject, there is no need to set the aperture (F-number) of the lens close to wide open. Rather, shooting at a certain aperture (F8 to F11) will allow you to more sharply depict the outlines and surface patterns of the moon. However, be careful not to stop down too much, as this requires a slower shutter speed and is more likely to result in camera shake.
Shutter speed
Shutter speed is another important setting when photographing the moon. Although it cannot be seen with the naked eye, the moon is moving at a constant speed relative to the earth, and the earth also rotates on its axis, so if the shutter speed is too slow, the subject will be blurred.
A good rule of thumb is to set a shutter speed of about 1/200 to 1/400 second. However, if camera shake occurs when shooting hand-held, use a faster shutter speed, such as 1/800 second. If you have access to a tripod, setting a slightly slower shutter speed will not be a problem.
ISO sensitivity
ISO sensitivity is a number that represents the amount of light that is captured by the sensor of the digital camera body as it passes through the lens. When photographing the moon, it is recommended that you first use a low ISO sensitivity (around ISO 100 to 200). This is because low ISO sensitivity allows you to take clear pictures with minimal noise.
However, if the light level is low, such as in the case of a crescent moon, or if you want a fast shutter speed, you may need to set a slightly higher ISO sensitivity (ISO 400 to 800). It is recommended to use a low ISO sensitivity and adjust it as necessary.
Tips for taking good moon photos
There are several tips for capturing the moon in an attractive way. Here are six tips for taking good moon photos.
1) Check the moon's age, direction, and time of moonrise and moonset.
The visibility of the moon changes from day to day. It is important to check the moon's age, which indicates the state of waxing and waning, using a moon age chart.
The direction and altitude of the moon also change with the seasons, so it is important to check this information as well. For example, you can easily check the moon's direction and orbit by using an app. By understanding the movement of the moon in advance, you can plan your shooting efficiently.
2) Check the shooting points
When choosing a moon photo shooting point, it is important to select a location that suits your purpose. If you just want to photograph the full moon, location is not so important as long as there is nothing to block the moon. The moon is bright enough, so ambient light is unlikely to be a problem.
On the other hand, if you want to combine the moon with buildings, mountains, or natural scenery, it is recommended to preview the shooting location beforehand. Actually visiting the site or using an online map service to confirm the location of the moon and the surrounding environment will help ensure smooth shooting on the day of the shoot.
3) Don't worry if it looks small when shooting. Trim the image after shooting.
When photographing the moon, the focal length of your telephoto lens may not be large enough to capture a sufficiently large image. For example, with a 200mm or 300mm telephoto lens, it may be difficult to capture the moon in the entire image.
In such cases, cropping can be used. After taking a picture, you can use photo editing software to crop the image to make the moon appear larger.
At first glance, you may be concerned about whether the craters and patterns on the surface have been properly depicted, but if you use a telephoto lens of 200mm to 300mm or more and take pictures with appropriate settings, you should be able to capture the moon beautifully enough even with a certain amount of cropping.
4) White balance
The color tone of the moon changes from time to time, influenced by atmospheric conditions, the moon's altitude, and ambient light. If you have a preferred image, you can adjust the white balance setting on your camera to get closer to the ideal view.
For example, if you want to express warm moon colors, set the white balance to “cloudy (overcast)” or “shady”. On the other hand, if you want to express a cool moon, it is recommended to set the white balance to “daylight (fluorescent light)” or “bulb. However, since the white balance setting can be adjusted with photo editing software after shooting, setting it to “auto” at the time of shooting is another option.
5) Consider the background and composition
While a powerful photo with the moon filling the entire image is attractive, you can expand the range of expression by combining the moon with a variety of backgrounds.
For example, photographing the moon against a tall building can create a fantastical atmosphere like in movies or science fiction. Also, overlaying the moon on a mountain or water surface can create a dramatic impression. In addition, you can take more impressive photos by composing your shots in a way that balances the position of the moon with the buildings and scenery in the background.
Try various angles and compositions to find your own unique expression.
How to photograph the moon by scene
When photographing the moon, the way to take pictures differs depending on the phases of the moon and the surrounding environment. Here, we will explain in detail how to photograph the moon in different scenes.
Making the full moon big and clear
If the full moon is clearly visible on a clear night, try setting the F-number at F8 to F10, the shutter speed at 1/100 to 1/400 second, and the ISO sensitivity at around ISO 100 to 200.
Using these settings as a basis, fine-tune the settings as you check the pictures you have taken. If the moon is too white, use a faster shutter speed to lower the exposure. Conversely, if the moon is darker, try a slower shutter speed. It is important to repeat trial and error while looking at the finished photo.
Crescent and half-moons

Crescent moons and half-moons often have less light than full moons. Therefore, it is often better to set a slightly slower shutter speed to capture beautiful images. It is a good idea to start with 1/100 to 1/400 second and gradually slow down.
You can also use a slightly smaller F-number to ensure brightness. However, to capture the moon's outline more sharply, it is recommended to set the F-number at about F4 to F6. You can also start with an ISO sensitivity of about ISO 100 to 200, and if it is too dark, adjust it to ISO 400 or ISO 800.
Another good time to photograph the crescent and half-moons is during the magic hour or blue hour. The moon will appear fantastic in the beautiful gradation of the sky, creating a more attractive photo.
Overlaying with natural scenery and buildings

When photographing the moon in combination with natural scenery or buildings, a wide-angle lens is effective. With a wide-angle lens, you can capture both the landscape in the foreground and the moon in the distance in a wide angle of view.
However, because the moon is extremely bright, it is more difficult to photograph it in combination with night scenes and natural landscapes. The moon tends to be blown out or the surrounding scenery darkened.
To solve this problem, it is best to aim for moonrise or moonset. When the moon is near the horizon, its light is weaker and it is easier to balance the brightness with the surrounding nature and buildings.
Oborozuki

Cloudy weather is a good time to take a picture of a hazy moon. The term “oboroizuki” refers to the moon's hazy appearance as seen through the clouds. To capture this fantastic appearance of the moon, set the shutter speed slightly slower, around 1/1 to 1/100 of a second, and adjust it according to the movement of the clouds and the brightness of the moon.
You can also use a slightly smaller F-number to create a soft light with a haze. It is difficult on days when the clouds are thick, but you will get a different expression of the moon.
The moon and starry landscape
A wide-angle lens is suitable for capturing the moon and starry sky at the same time. By using a wide-angle lens, you can capture the moon and the surrounding starry sky over a wide area. However, because of the moon's strong brightness, it can be difficult to balance it with the other stars.
Therefore, as with photographing night scenes, it is best to aim for a timing when the light is weak at moonrise or moonset.
How to select the right lens for moon photograph

To avoid making mistakes when photographing the moon, it is important to select an appropriate lens. Here are some points to keep in mind when choosing the right lens for moon photography.
Focal length
To capture the moon in large, detailed images, a lens with sufficient telephoto capability is necessary. As mentioned above, a telephoto lens with a focal length of about 200mm to 300mm can properly depict the patterns on the lunar surface. An ultra-telephoto lens with a focal length of 300 mm or more will be able to capture even finer details of craters and irregularities.
However, the longer the focal length, the more likely it is that camera shake will occur, so the use of a tripod is essential. Also, the weight of the lens increases, so care must be taken when carrying and maneuvering it.
F-number
The smaller the maximum aperture F value, the more light can be captured. Especially in the case of a crescent moon or half-moon, the amount of light is likely to be insufficient. In such situations, a lens with a small maximum aperture F value makes it easier to take bright pictures. A lens with a small maximum aperture F-number is also effective for taking pictures with blurred backgrounds, making it useful for a wide range of applications other than moon photography.
Size and weight
The longer the focal length of a telephoto lens, the larger it tends to be. Since large and heavy lenses affect the ease of carrying and handling, it is recommended that you actually hold the lens in your hand to confirm the size and weight. A tripod is often used when shooting the moon, but a light and compact lens will make it easier to suppress camera shake when shooting hand-held.
AF (auto focus) and image stabilization mechanisms
Since moon photography requires focusing in dark conditions, AF (autofocus) performance is important. We recommend that you choose a lens that can focus smoothly and track moving subjects.
If handheld shooting is a consideration, choosing a lens with an image stabilization mechanism will give you peace of mind. The image stabilization mechanism helps you take pictures with less camera shake, even at slower shutter speeds.
Take on the challenge of moon photography with tips on exposure settings and lens selection!
When photographing the Moon, it is important to select the appropriate equipment, camera settings, and preparation in advance. On the other hand, anyone can enjoy moon photography without special equipment. Let's take a look at basic exposure settings and try taking lots of shots.

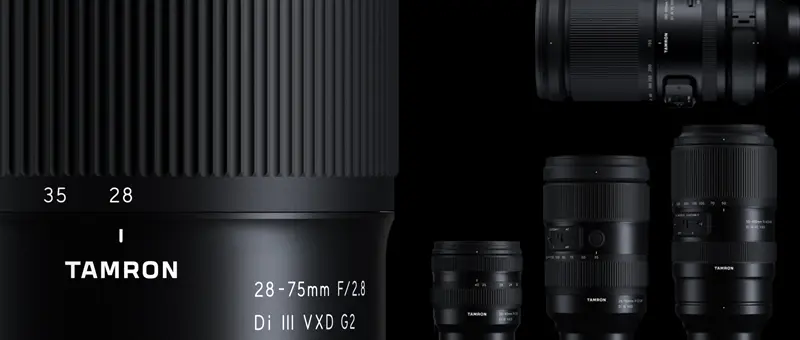
Lens Featured in this Impression
-
-
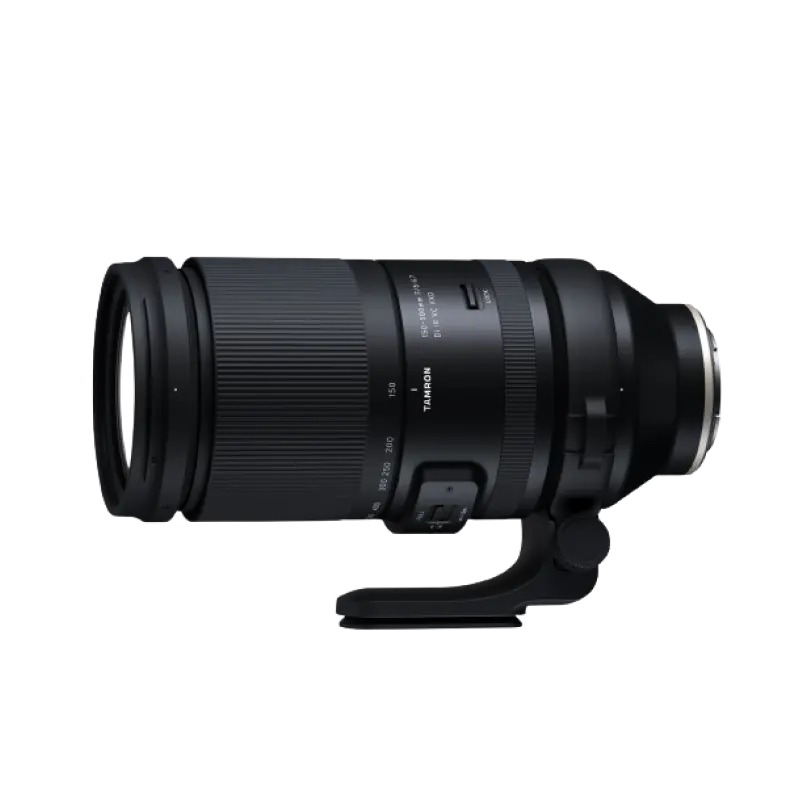
150-500mm F/5-6.7 Di III VC VXD a057(Model )
The 150-500mm F/5-6.7 Di III VC VXD (Model A057) is compact enough to be handheld while maintaining a focal length of 500mm on the telephoto end. It allows users to easily enjoy the world of the 500mm ultra-telephoto lens while maintaining its high image quality. The high-speed, high-precision AF with excellent tracking performance and the VC mechanism support handheld shooting in the ultra-telephoto range.
-

-
50-400mm F/4.5-6.3 Di III VC VXD a067(Model )
The 50-400mm F/4.5-6.3 Di III VC VXD (Model A067) is an ultra-telephoto zoom lens with an 8x zoom starting at 50mm at the wide-angle end and compatible with full-frame mirrorless cameras. The lens delivers uncompromised high image quality over the entire 50-400mm focal length range, yet is as compact and lightweight as a 100-400mm class lens. Equipped with the VXD mechanism and the VC mechanism, the lens can quickly focus on the subject's movement when shooting sports and wild birds. The 50-400mm F4.5-6.3 VC is a new ultra-telephoto zoom lens that combines unparalleled image quality and mobility.
-

-
20-40mm F/2.8 Di III VXD a062(Model )
The 20-40mm F/2.8 Di III VXD (Model A062) is a new large-aperture standard zoom lens that thoroughly pursues portability. While covering the range from the ultra-wide angle of 20mm to the standard range of 40mm, it is the smallest and lightest in its class. It also offers high image quality throughout the entire zoom range, making it useful not only for still image shooting but also for video recording such as vlogging. The VXD, which is quiet and agile, achieves high-speed, high-precision autofocusing. It is a new, unprecedented large-aperture standard zoom lens that allows users to easily enjoy taking out and shooting both still and video.
-
-
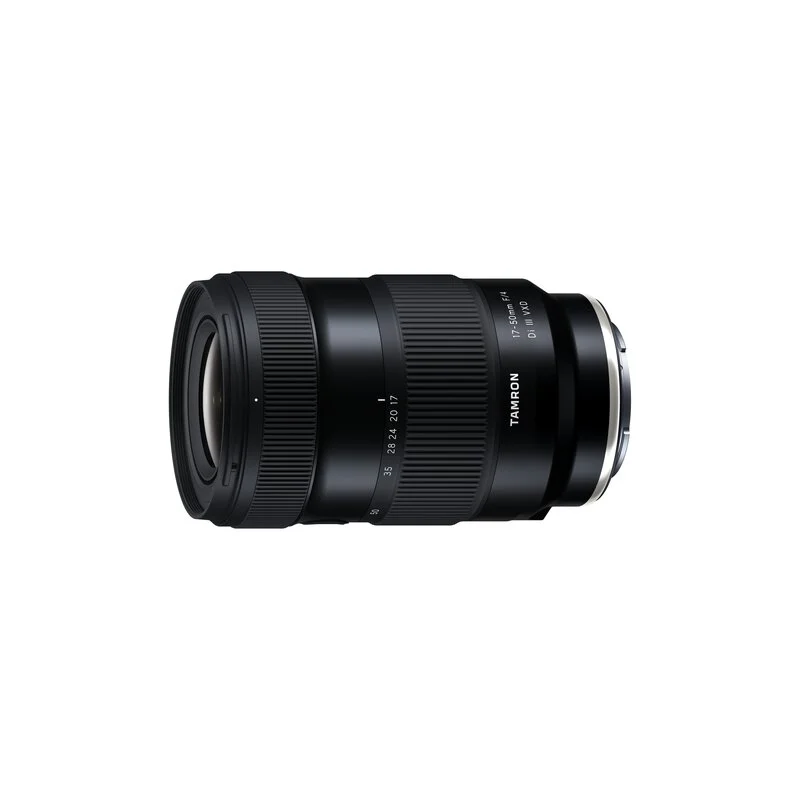
17-50mm F/4 Di III VXD a068(Model )
It's the world’s first lens covering from ultra wide-angle 17mm to the standard 50mm focal length. The highly-compact TAMRON 17-50mm F/4 Di III VXD (Model A068) for Sony E-mount full-frame mirrorless cameras offers maximum versatility for still and video creators. From landscapes to living rooms, this lens captures all that you see.
-
-
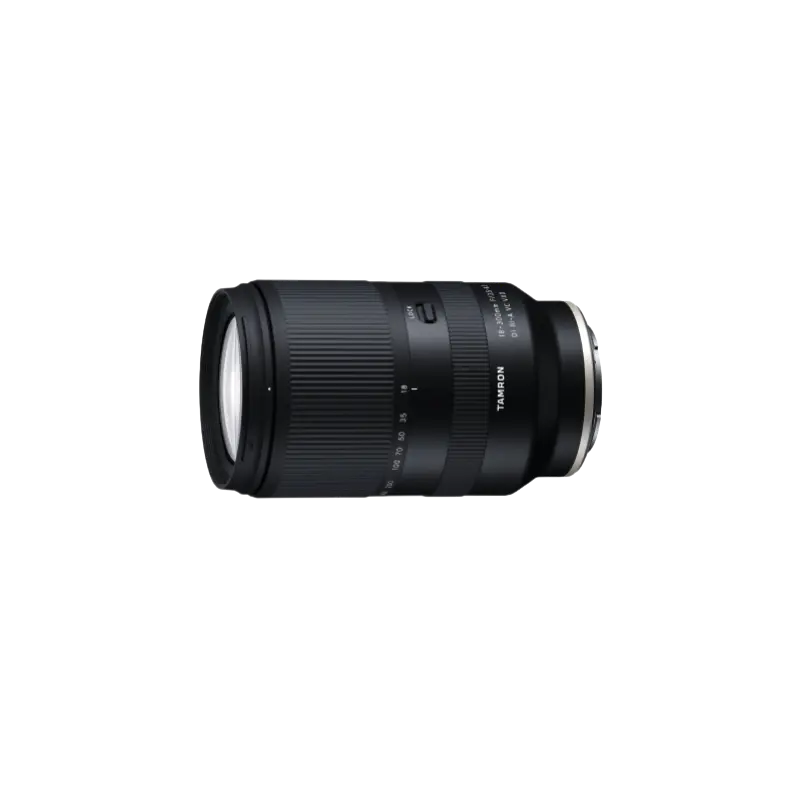
18-300mm F/3.5-6.3 Di III-A VC VXD b061(Model )
The 18-300mm F/3.5-6.3 Di III-A VC VXD (Model B061) achieves 16.6x zoom and is equipped with the VXD for a quiet and agile AF drive. The optical construction includes several special lens elements, specifically four LD (Low Dispersion) and three hybrid aspherical lens elements. These elements help to produce clear, sharp images from the center to the corners and deliver top-level image quality in its class. It is enabled close-up shooting and is equipped with the VC system. The 18-300mm F/3.5-6.3 makes photography more fun because you can use it in an unlimited number of situations. It’s so versatile, it will inspire you to push your creativity further and further.