December 10, 2024
[How to photograph autumn foliage] Tips for capturing expansive landscapes and colorful leaves, and choosing the suitable Lens
[How to photograph autumn foliage] Tips for capturing expansive landscapes and colorful leaves, and choosing the suitable Lens
![[How to photograph autumn foliage] Tips for capturing expansive landscapes and colorful leaves, and choosing the suitable Lens [How to photograph autumn foliage] Tips for capturing expansive landscapes and colorful leaves, and choosing the suitable Lens](/global/consumer/article_file/file/article-how-to-shoot-autumn-leaves/01-en.webp)
![[How to photograph autumn foliage] Tips for capturing expansive landscapes and colorful leaves, and choosing the suitable Lens [How to photograph autumn foliage] Tips for capturing expansive landscapes and colorful leaves, and choosing the suitable Lens](/global/consumer/article_file/file/article-how-to-shoot-autumn-leaves/01-en.webp)
With the arrival of autumn comes the season of autumn foliage, when trees turn brilliant colors. Many people would like to capture the beautiful scenery in their photographs. However, it is surprisingly difficult to take pictures of the scenery the way you want. In this article, we will introduce basic tips on how to take beautiful pictures of autumn foliage, as well as some useful knowledge for beginners. We will explain from various angles, such as exposure settings and lens selection.
Shooting scenes with brilliant autumn leaves
One of the attractions of autumn foliage photography is capturing the vivid colors and autumnal scenes. The same autumn foliage can take on a completely different appearance depending on the scene and composition of the shot. Here are some typical scenes where autumn leaves look especially beautiful, along with some tips for photographing them.
Scenes with autumn leaves spreading all over
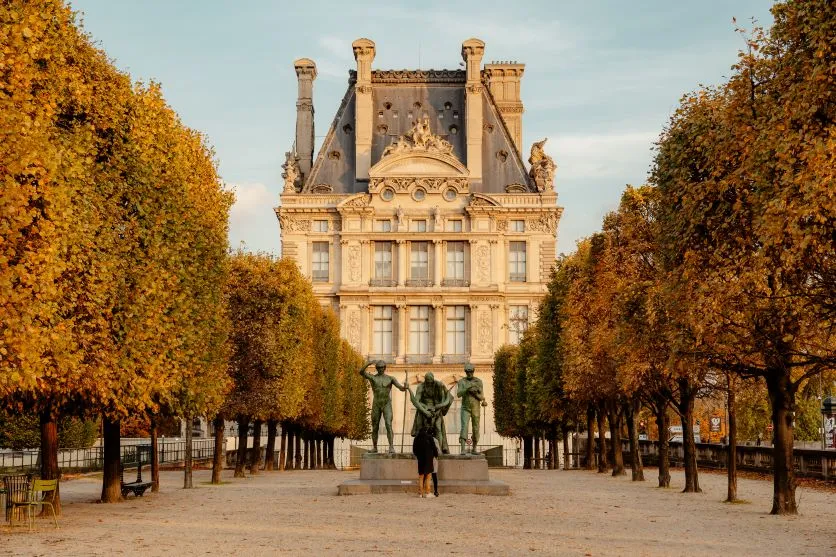
The beauty of autumn foliage can be fully appreciated when it is spread over a vast landscape. A wide-angle lens is recommended for photographing this type of scenery. By using a wide-angle lens with a focal length of approximately 35 mm or less, you can capture powerful landscape photos with a wide field of view.
Set the F-number at approximately F8 to F11. This will allow you to focus on a wide area from the front to the back, creating a landscape with depth.
In addition, by taking advantage of the contrast between the blue sky and the autumn leaves, you can take more impressive pictures. Especially in the morning on a sunny day, the air is clear, and the contrast is even more pronounced.
Close-up of leaves
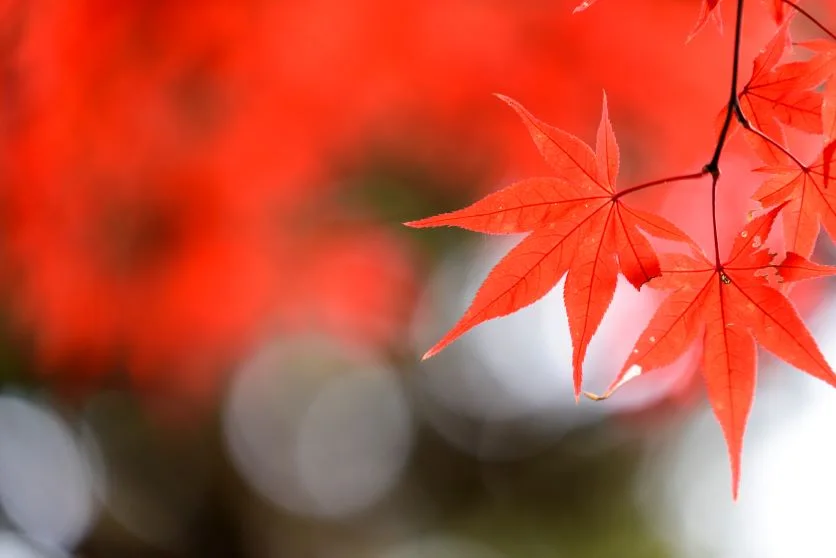
The charm of autumn leaves lies in their delicate colors and textures. Close-up photography of leaves can beautifully capture these details. Use a lens with a short minimum focus distance to get close to the subject or use a macro lens to capture the surface of the leaves in detail.
Use an aperture close to maximum aperture (F2.8 to F4) and blur the background to bring out the details. If you want to capture the color of the leaves in a more intense way, it is also effective to use low exposure.
Fallen leaves
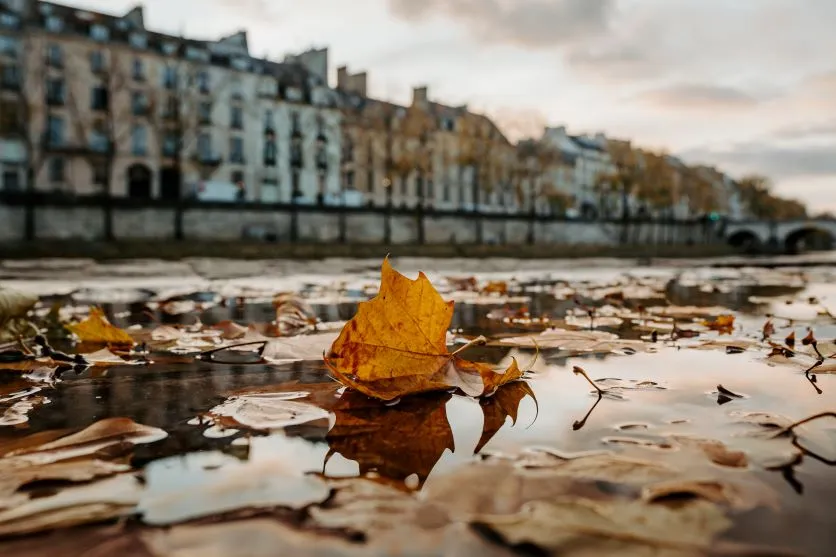
Fallen leaves scattered on the ground also show a beautiful aspect of autumn foliage. Use a wide-angle lens or a standard lens to capture fallen leaves from an overhead view.
A good rule of thumb is to use a F-number between F5 and F8. This will bring the fallen leaves into focus and allow you to capture the beauty of their shapes and their contrast with the ground in vivid detail. It is also interesting to pay attention to the arrangement of fallen leaves and color combinations to find beautiful patterns in nature.
The time of day is also an important factor; on a cold morning, you can capture fallen leaves wet with morning dew.
Autumn leaves reflected on water
Autumn leaves reflecting off lakes and ponds create a fantastic and beautiful scene. Choose a sunny day with as little wind as possible, use a tripod, and set a slow shutter speed to create a smooth water surface.
A PL filter is also helpful to reduce reflections on the surface of the water, so it is recommended to carry one. For composition, divide the autumn leaves and their reflection in the water into two halves to create a beautiful symmetry.
Light up at night
Autumn leaves lit up at night also create a fantastic atmosphere. Since you will be shooting in the dark, it is recommended to use a F-number of about F4 to F6, a shutter speed of about 1/10 to 1/50 second, and an ISO sensitivity of about ISO 800 to 1600.
To take colorful pictures in areas where the light source is weak, it is also a good idea to use a tripod and take pictures with a long exposure time. If the areas around the light source are blown out, use exposure compensation to reduce the brightness or make other adjustments accordingly.
Portrait
Portrait photography with autumn leaves in the background also makes for a wonderful autumnal shot. Use a standard or telephoto lens with a maximum aperture of F2.8 to F4 to blur the background. This will bring out the person in the background and add a gorgeous autumnal touch.
Backlighting can also create an impressive photo by enveloping the outline of the person in the warm light of the autumn foliage. If the person's face is in shadow, set the exposure compensation to about +1EV to capture the person's facial expression.
How to take beautiful pictures of autumn leaves?
There are several points to consider in order to capture the vivid colors of autumn foliage in your photos. Here, we will explain tips for photographing autumn foliage, including exposure settings and how to choose the right lens to use.
Know when the autumn leaves are at their best
The basic premise before taking pictures is to make sure you know when the leaves are at their best. The timing of peak foliage viewing varies by region and elevation.
In general, the autumn foliage usually starts around late November in the plains west of Tokyo and the Kanto region, and around late September in Hokkaido, but it can vary from year to year. It is advisable to check the latest information on the websites of local sightseeing associations and weather forecast sites in advance. Also, even in the same area, the best time to view the leaves may vary depending on elevation, so be especially careful when photographing the autumn foliage in the mountains.
It is important to understand the period from the beginning of the fall foliage to the end of the fall foliage, and plan accordingly to the images you wish to capture.
Lenses suitable for photographing autumn foliage
A variety of lenses can be used for photographing autumn foliage, but it is important to select the appropriate lens for the scene.
First, a wide-angle lens (focal length of about 35 mm or less) is ideal for capturing vast autumn foliage landscapes. Next, a standard lens (focal length of approximately 35mm to 80mm) is between a wide-angle lens and a telephoto lens and can be used for a wide range of scenes. Finally, telephoto lenses (focal length of about 80 mm or more) can be used for close-ups of distant foliage and to capture a portion of the landscape.
Considering the ease of use for beginners, a zoom lens covering the wide-angle to standard range is recommended. This single lens can be used for a variety of foliage scenes, allowing you to try a wide range of expressions without having to change lenses. Also, consider the aperture F-number and close-up shooting ability, which will be discussed later, when selecting a lens.
Guideline for exposure settings
Appropriate exposure settings are essential for beautiful autumn foliage photography. Here are some guidelines for suitable exposure settings for autumn foliage photography.
Shooting mode
Aperture priority mode is the easiest mode to use when shooting autumn foliage. In this mode, the shutter speed is automatically adjusted to obtain the correct exposure when the F-number is set, making it easy for beginners to use. It is also easy for beginners to adjust the bokeh condition as a standard.
F-number
The F-number (aperture value) setting depends on the subject to be photographed and the atmosphere you want to express. When shooting an entire landscape, setting a large F-number (F8 to F11 is a good rule of thumb) will make it easier to capture a wide area from the foreground to the background in sharp focus.
On the other hand, if you want to emphasize the subject by blurring the background, such as in a close-up of a leaf, a smaller F-number setting (F2.8 to F4 is recommended) is recommended. This will produce a beautiful bokeh effect that highlights the subject.
Shutter speed
Adjust the shutter speed to suit the environment in which you are shooting, using 1/50 sec. to 1/200 sec. as a guide. For example, if trees are swaying in the wind, a faster shutter speed is necessary to prevent blurring of the subject.
When photographing illuminated foliage, it is best to use a tripod and set a slower shutter speed. In this way, it is important to be able to flexibly adjust settings according to the situation at the time of shooting.
ISO sensitivity
If you are shooting during sunny days, a low sensitivity of ISO 100 to ISO 400 will produce bright, clear images. If it is a cloudy day or in a dark place and you want a fast shutter speed, try increasing the sensitivity to ISO 800 to ISO 3200.
However, the key is not to raise the ISO sensitivity too high, as noise (roughness) may become noticeable.
Exposure compensation
Exposure compensation is a function to fine-tune the camera's automatic exposure settings. If you see white pops (overexposure) on sunny days, set the exposure compensation to about -1.0 EV. If your pictures are dark (underexposure) on cloudy days or in dark places, set it to about +1.0 EV to help balance the brightness.
White balance
Auto white balance (AWB) can be used in many shooting situations, but if you want to create the color and atmosphere you prefer, you should try various other white balance settings. Basically, select a setting that matches the weather conditions at the time of shooting, such as “sunny” or “cloudy,” but you can also dare to set it to “cloudy” or “shady” to change the look and color.
For more detailed and authentic adjustments, we also recommend shooting in RAW format. Since you can freely adjust the white balance later, you will be able to adjust colors more as you wish.
Consider the background and composition
Even with the same subject, changing the background or composition can greatly change the impression. Here are some typical compositions that are useful for autumn foliage photography.
Photographing against various backgrounds
The choice of background is important to bring out the best in autumn foliage.
For example, shooting against a blue sky or sunset makes the vividness of the autumn leaves stand out and creates a striking image. On the other hand, using mountains or buildings in the background can create a contrast in scale and overlap of scenery with the autumn leaves. Also, by bringing the surface of the water into the foreground, you can even create a fantastical image by taking advantage of the reflected autumn leaves.
In this way, it is easy to find beautiful compositions by taking pictures with different backgrounds.
Compositions that are useful to know
Knowing a few basic compositions will help you to respond to a spur-of-the-moment photo shoot without hesitation. Here we introduce three compositions that are often used. Let's try to find your own expression by applying these compositions.
Rule of thirds composition
In the rule of thirds composition, the image is divided into three equal parts, one vertical and one horizontal, and the main subject is placed at the intersection of the three parts. For example, if you place the border between the autumn leaves and the sky in line with the horizontal lines of division, you can create a balanced and stable composition. When photographing more expansive landscapes, a rule of fourths composition can also be easily used.
Diagonal composition
Diagonal composition is a composition in which the subject is placed on the diagonal of the picture plane. It is suitable for expressing the movement, depth, and dynamics of the subject. In photographing autumn foliage, it can be applied by placing tree-lined avenues or streams along the diagonal. If you find a linear landscape, you may want to give it a try.
Hinomaru composition
Hinomaru composition is a composition in which the main subject is placed largely in the center of the image and surrounded by the surrounding elements. For example, it can be used to place a single tree that stands out in the landscape or to take close-ups of foliage. While it can produce simple yet impressive photos, it can also make the image appear lackluster, so care must be taken when selecting a background.
Consider the direction of the light and how it hits the subject
The way the light hits the foliage is also an important factor in changing the impression of the foliage. Here are the main directions of light and their characteristics.
Forward light
Forward light refers to the direction in which light hits the subject from the front. By shooting with the sun at your back, it is easier to faithfully and vividly express the colors of autumn foliage.
Especially when photographed in the soft light of a sunny morning or evening, it is possible to bring out the beautiful colors of autumn leaves.
On the other hand, it is important to note that it is difficult to express a sense of three-dimensionality and depth because it is difficult to see shadows. This is best suited for expansive autumn foliage landscapes or when you want to emphasize the beauty of the colors.
Backlighting
Backlighting is the direction in which light hits the subject from behind. The light is scattered by the contours of the leaves, producing a beautiful glow. The light transmitted through the leaves also creates a warm atmosphere.
On the other hand, it should be noted that the subject tends to be dark. If the details are in shadow, adjust the exposure compensation in a positive direction to capture the colors of the autumn leaves.
Backlighting with the sunrise or sunset in the background can produce particularly dramatic autumn foliage photos.
Sidelight
Sidelight refers to the direction in which light hits the subject from the side. Shadows and shadows are emphasized, and the unevenness and three-dimensionality of the leaf surfaces are accentuated.
Especially in the morning and evening when sunlight shines in from an angle, the contrast between the light and the shadows created by the autumn foliage is striking, creating a beautiful three-dimensional effect. It is also suitable for expressing details such as the delicate texture and veins of autumn leaves.
Differences in the impression of light depending on the time of day
The impression of natural light, which changes depending on the time of day, also greatly affects the atmosphere of a photograph.
For example, early in the morning, the clear air and soft light create a clear, crisp atmosphere. On the other hand, during the golden hour, just before sunset, the autumn foliage will beautifully come to life in the fantastic, warm light. Also, during the daytime, the contrast is clearer in the strong light, making it easier to capture vivid colors.
In this way, by being aware of the intensity of sunlight and the changes in color at different times of the day, you can bring the impression of the photo closer to the image you have in mind.
Changing the angle and position of the camera
Shooting from different camera angles and positions is another effective way to make your autumn foliage photos more attractive. For example, shooting from a low angle can emphasize the expanse and power of autumn foliage. Also, holding the camera close to the ground creates a sense of perspective and gives the photo an impressive sense of depth.
On the other hand, shooting from a high angle gives you a bird's-eye view of the expanse of autumn foliage. Photographing autumn foliage from a high vantage point, such as on high ground or a bridge, will give you a beautiful impression of a carpet of autumn leaves.
When photographing fallen leaves, shooting from a low position close to the ground can dynamically express depth. Try experimenting with different angles and positions to discover new discoveries and expressions.
Utilize filters
By utilizing filters, you can expand the range of expressions in your autumn foliage photos. For example, the PL filter is effective when photographing the surface of the water and autumn leaves. By reducing reflections on the water surface and adjusting the shadows of the autumn leaves, you can obtain a clearer image.
ND filters, on the other hand, are useful when shooting in environments that tend to be overexposed or when you want to take long exposures. For example, it is useful in scenes where you dare to shoot a fast-moving subject such as a waterfall or river with a slow shutter speed to express the smooth flow of water and capture fantastic examples.
By making good use of these filters, you will be able to capture more impressive and beautiful autumn foliage photographs.
How to choose a lens for autumn foliage photography
As mentioned above, it is important to select a lens that matches the image you want to capture when photographing autumn foliage. Here, we will introduce how to select a lens in terms of focal length and maximum aperture F-number.
Focal length
Although different lenses can be used in a variety of ways when photographing autumn foliage, you should start with a zoom lens that covers the wide-angle to standard range and a high-power zoom lens that covers the telephoto side of the range.
Wide-angle lenses with a focal length of about 35 mm or less are suitable for capturing vast autumn foliage landscapes or large nearby trees. Standard lenses with a focal length of around 50mm are suitable for capturing impressions as you see them, from snaps to landscapes to portraits. Therefore, zoom lenses covering these focal lengths are easy to use in many situations.
On the other hand, telephoto lenses with focal lengths of about 80 mm or more are ideal for close-ups of distant foliage and capturing details of the leaves from a distance. Having a single telephoto lens will further expand your range of expression.
F-number
A lens with a small maximum aperture makes it easier to take brighter pictures. For example, a lens with a maximum aperture of F2.8 or less makes it easy to secure exposure in dark places such as cloudy weather or dark forests. It is also easy to obtain large, beautiful background blur, making it suitable for close-ups of foliage and portrait photography. For this reason, lenses with a maximum aperture of F2.8 to F4 are recommended.
Weight and compactness
When photographing autumn foliage, people often spend long hours walking around in mountains and parks. Therefore, a lightweight and compact lens is useful for mountain climbing and long walking trips. Compact lenses are recommended, especially if you consider carrying them with you when traveling. A highly portable lens is less likely to cause physical stress even if you carry it with you at all times, and you will naturally have more opportunities to take pictures.
Capability of close-up photography
The ability to shoot close-up is also important for capturing the details of autumn foliage. A lens with a short minimum focus distance is ideal for capturing the subtle details of autumn foliage. Even without a macro lens, it is possible to create an expression similar to that of a macro lens.
Autofocus (AF) performance
Since photographing autumn foliage requires quick focusing on the wind-swept leaves and changing light, AF performance should also be taken into consideration. By choosing a lens that can focus smoothly, you will be able to capture the decisive moment without missing it. At the same time, it is also a good idea to check the quietness of the AF operation and the operability of manual focusing.
Ambiguity correction mechanism
An image stabilization mechanism is very useful to improve stability when shooting hand-held. This is especially important when using telephoto lenses, which are prone to camera shaking.
To take beautiful autumn foliage photographs
The best part of photographing autumn foliage is capturing the vividness of the changing seasons. Try to take advantage of the tips on exposure settings and composition to take pictures. Also, by choosing the right lens, you can get closer to the image you want to capture. Try expressing the beauty of autumn leaves in your own way.

Lens Featured in this Impression
-

-
11-20mm F/2.8 Di III-A RXD b060(Model )
Product Page | 11-20mm F/2.8 Di III-A RXD (Model B060) is the world's first compact, lightweight F2.8 ultra wide-angle zoom lens for Sony E-mount APS-C mirrorless cameras. Can be a great choice for video shooting.
-
-
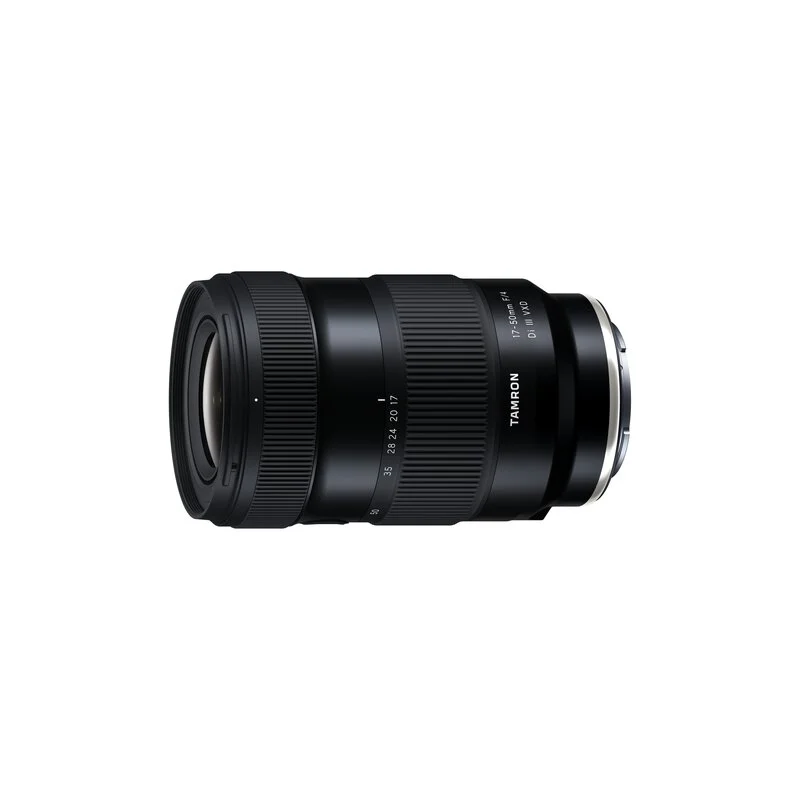
17-50mm F/4 Di III VXD a068(Model )
It's the world’s first lens covering from ultra wide-angle 17mm to the standard 50mm focal length. The highly-compact TAMRON 17-50mm F/4 Di III VXD (Model A068) for Sony E-mount full-frame mirrorless cameras offers maximum versatility for still and video creators. From landscapes to living rooms, this lens captures all that you see.
-

-
28-75mm F/2.8 Di III VXD G2 a063(Model )
Product Page | 28-75mm F/2.8 Di III VXD G2 (Model A063) is the second-generation fast-aperture standard zoom lens for Sony and Nikon full-frame mirrorless cameras, offering significantly improved optical and autofocus performance and new function customization.
-

-
17-70mm F/2.8 Di III-A VC RXD b070(Model )
The 17-70mm F/2.8 Di III-A VC RXD (Model B070) is a large-aperture standard zoom lens for APS-C format mirrorless cameras. With a focal length range of 17mm to 70mm (a full-frame equivalent of 25.5-105mm) for daily use, this achieves a 4.1x zoom. The optical design ensures high resolution and high contrast not just in the center of the image but also in corners and at the edges. The quiet AF drive motor and the VC image stabilization mechanism facilitate hand-held shooting. In addition, by counteracting focus breathing, the 17-70mm F2.8 empowers users' expression of their creative intentions to the fullest degree. This highly practical lens allows you to easily enjoy the high image quality of a large F2.8 aperture for both still and video shooting.
-
-
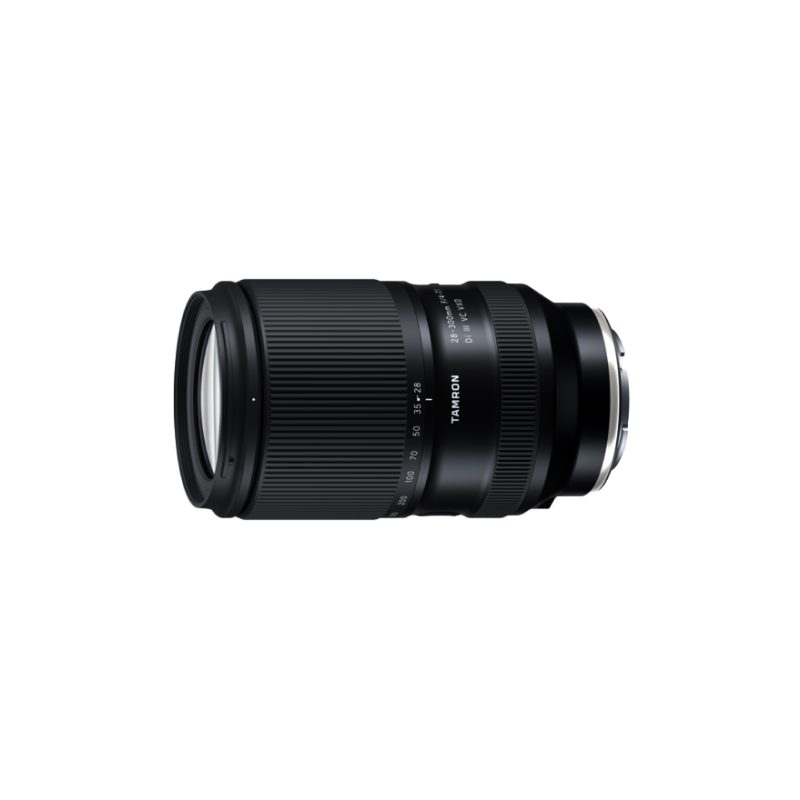
28-300mm F/4-7.1 Di III VC VXD a074(Model )
28-300mm F/4-7.1 Di III VC VXD (Model A074) is a compact and versatile all-in-one 10.7x zoom lens for Sony E-mount. The lens boasts class-leading high image quality, and is equipped with high-speed AF VXD and VC. Go from wide-angle to long telephoto in an instant and capture every moment of the world around you.

