November 29, 2024
How to maintain and clean lenses for cameras (Including seasonal considerations)
How to maintain and clean lenses for cameras (Including seasonal considerations)


Proper care and cleaning are essential to keep your precious lenses in use for a long time. However, many people are concerned about maintaining expensive and delicate lenses by themselves. There may be many such people. In this article, we will provide detailed information on how to clean and store lenses, as well as seasonal precautions.
What you need to prepare
You will need several tools to care for your lenses. Be sure to have a blower, lens cloth, lens cleaner solution, and other basic cleaning items.
Blower
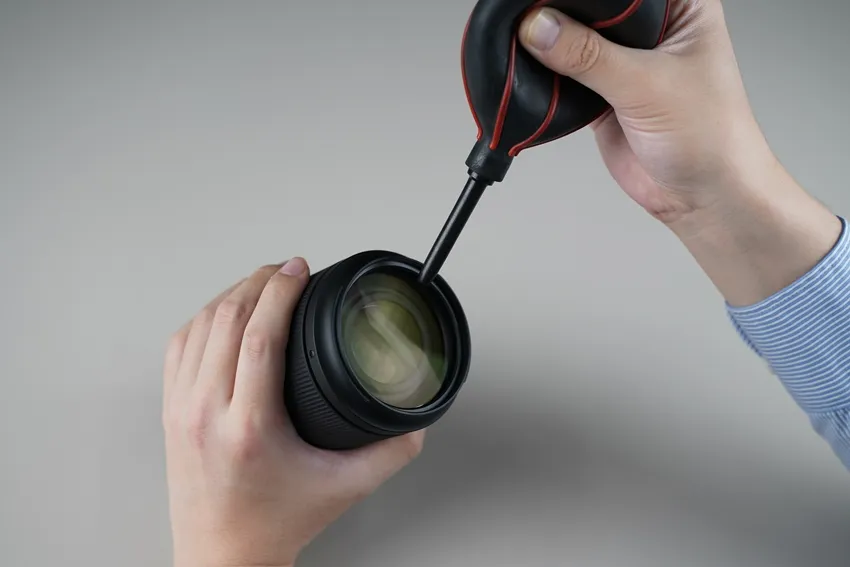
A blower is an essential item for blowing away dust, dirt, and other particles on the lens surface and camera body. It should always be used as the first step in the cleaning process to avoid damaging the lens.
There are several types of blowers available, but we recommend the hand-held blowers. You can control the strength of the air you blow, so the cleaning is gentle on the lens.
There are also can-type blowers like air dusters, but there is no possibility of damaging the lens with too strong air pressure or allowing water or impurities to get inside. Use caution when using them.
Lens cloth
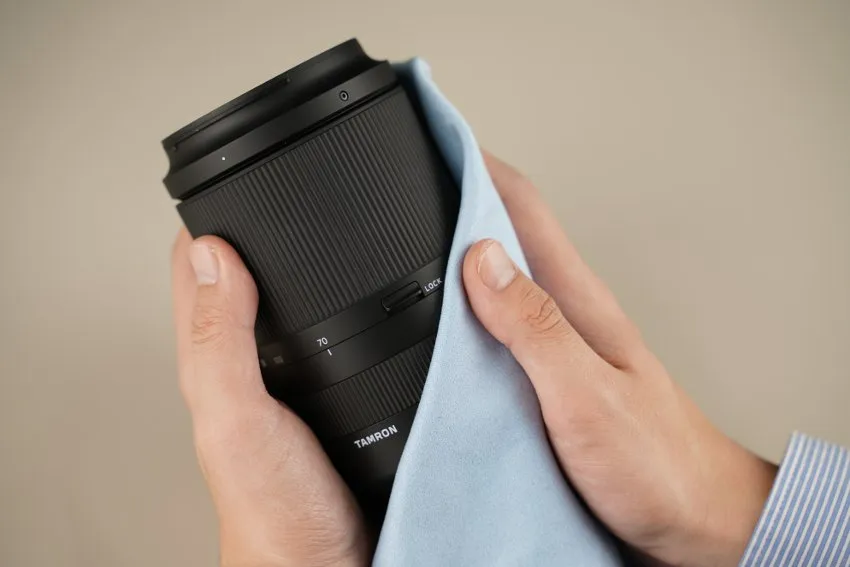
Lens cloths are used to wipe the camera body and lens barrel. Microfiber cloths are made with very fine fibers, so they can effectively remove dirt without scratching.
It is also economical to choose a cloth that can be washed and used repeatedly. After use, the lens cloth should be washed and dried in an appropriate manner. It is also important to store them in a clean place to prevent dust and dirt from adhering to them.
Lens cleaner solution
Lens cleaner fluid is a special liquid used to remove dirt from lenses. There are various types available, but choose one specifically for camera lenses. Never use organic solvents such as benzene or thinner.
Also, when using a cleaner solution, be sure to soak a small amount into cleaning paper or cloth, rather than directly onto the lens.
Lens cleaning paper
Lens cleaning paper is a special paper used to wipe off the lens surface. Unlike ordinary tissue paper, it is made of a material that does not produce fiber waste and does not damage the lens.
The paper is disposable, so by using a new one each time, there is no risk of the lens getting dirt on it again from the previous cleaning.
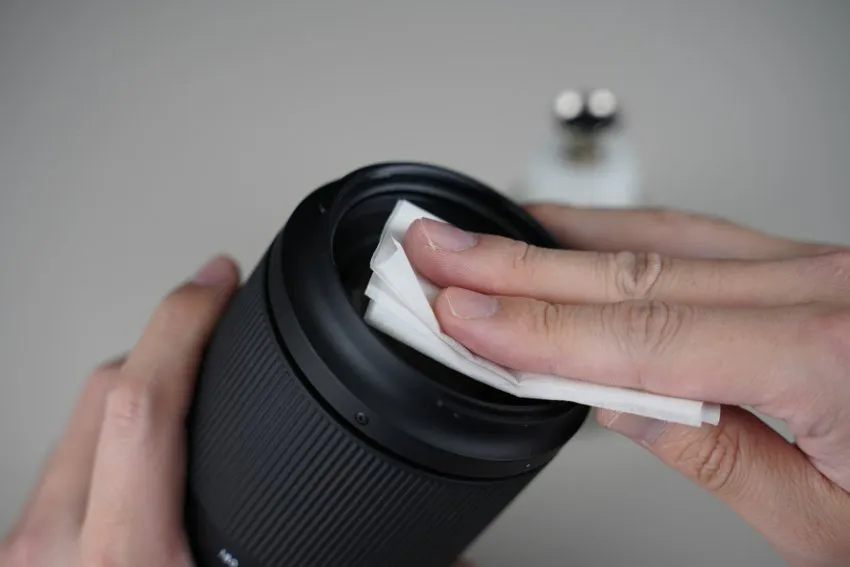
To use the paper, fold the paper and using the clean side, gently wipe in a circular motion from the center of the lens outward.
Cleaning procedure
To clean the lens, use a blower to remove fine particles and dust, and then wipe the lens with a cleaner. Here are the details of the cleaning procedure.
1) Flow fine particles and dust away with a blower
First, use a blower to remove fine dust and dirt from the lens surface. Always start with the blower, as wiping the lens with dust and dirt on it may cause scratches on the lens surface due to the particles. Also, be careful not to let the tip of the blower touch the lens.
2) Wipe up the front of the lens (front element)
After removing dust with the blower, wipe up the front surface of the lens (front element). Apply a small amount of cleaner solution to lens cleaning paper and wipe the front of the lens in a swirling motion from the center of the lens outward.
When wiping the lens, do not press hard on the lens. It is important to wipe the lens gently with just enough force to lightly touch the lens. Applying strong force may damage the coating on the lens.
As a precaution, if the lens has an antifouling coating, using a cleaner solution may cause the coating to peel off. In such cases, do not use the cleaner solution, but wipe the lens dry only.
3) Wipe up the rear surface of the lens (back surface)
Wipe the rear surface of the lens in the same manner as the front surface.
At the same time, clean the mount joint. This is an area where dirt tends to adhere to the lens because it is often touched with fingers when changing lenses. Use a lens cloth or cotton swab to carefully wipe it clean. Be careful not to touch the contact points with your fingers to prevent sebum and other contaminants from adhering to them.
4) Wipe up the lens barrel (lens body)
Finally, clean the lens barrel (lens body). First, use a blower to blow out dust and dirt that has gotten into the grooves of the zoom and focus rings.
Then, using a lens cloth, wipe the entire lens barrel dry. No cleaner solution should be used for this part; wiping it dry is sufficient. However, be careful not to scrub too hard, as some body materials may be easily scratched. Also, for lenses whose total length changes with zooming, wipe the lens barrel gently with a dry cloth when the lens is fully extended.
Cleaning frequency
The frequency of lens cleaning depends on the usage conditions and environment. Excessive cleaning may have the opposite effect, so it is not necessary to clean the lens frequently.
It is recommended that cleaning be performed each time visible dirt adheres to the lens. For example, if fingerprints have been applied, if the image was taken outdoors on a windy day, or if the image was taken in a dry or dirty environment such as a beach or desert, cleaning should be performed on the same day.
As for regular maintenance, cleaning every two to three months or so should be sufficient. However, if there are no noticeable stains, do not use a cleaner solution and simply wipe the lens dry.
Lens storage
In order to use lenses for a long time, the way in which they are stored is just as important as the cleaning process. Storing lenses in the correct environment will prolong their life.
Avoid high temperatures and humidity, and keep them in a well-ventilated place
The biggest enemies of lenses are dust and humidity. These can cause damage to the lens, so it is important to manage the lens to avoid them as much as possible. However, if the humidity is reduced without consideration, it may cause deterioration of the lens grease, rubber, and coatings. Therefore, as a guideline, try to maintain a humidity level of 40-50%. Within this range, you can avoid damage to the lens due to dryness while preventing the formation of mold.
Also, choosing a well-ventilated location will prevent dust and debris from accumulating. Direct sunlight can also cause lens deterioration, so store lenses in a location away from sunlight. Avoid places where the lens is directly exposed to the wind from air conditioners or other types of air conditioning. Sudden temperature changes can cause condensation inside the lens.
If possible, it would be convenient to use a moisture-proof cabinet, but this may not always be possible. If a moisture-proof cabinet is not available, place desiccants in a dry box and use a hygrometer to control the humidity.
Cautions when using desiccants
Although desiccants such as silica gel are effective in preventing humidity, be careful not to use too much when using them. Excessive use of desiccants can lead to an excessive decrease in humidity, which, as mentioned above, can result in an undesirable environment. Install a hygrometer and try to maintain an appropriate level of humidity (40-50%).
Also, pay attention to the expiration date of desiccants. Expired desiccants will lose their ability to absorb moisture and cause the humidity to increase. Be sure to use desiccants that are within their expiration date, and replace them with new ones when the expiration date arrives.
Cautions when storing in a moisture-proof cabinet
First, it is important to set the appropriate humidity level. Again, a humidity of 40-50% is a good rule of thumb. Be careful not to lower the humidity too much.
Also, when storing lenses, be sure to remove them from the camera body. If the lens is stored with the camera body connected to the lens, moisture tends to accumulate at the contact points. It is also important to remove filters and store the lens with the front and rear caps in place.
Regularly remove and operate the lens
Even if the lens will not be used for a long period of time, it is advisable to take the lens out of storage and operate the focus and zoom rings every two to three months or so. This process will replace the air inside the lens and prevent moisture from accumulating.
Also, by touching the lens regularly, you can check its operation. At that time, if you notice any discomfort in its operation, consider sending it to the manufacturer's maintenance service.
[By season] Common problems and countermeasures
The causes of lens problems also vary depending on the climate. For example, mold is a typical problem in the humid rainy season, but it is also likely to occur in summer and winter when there are differences in temperature. Knowing the problems specific to each season, let's prevent damage to lenses before it happens.
[Spring] How to prevent pollen and yellow sand
In spring, the lens is more susceptible to pollen, yellow sand, and other microscopic dust and dirt particles. These particles are very small and adhere to lens surfaces and details.
Especially in spring, the wind often blows strongly, which tends to raise the dust and sand and make it easier to get into the lens. Especially when shooting on windy days, it is a good idea to wear a lens cap when not in use.
Also, after shooting outside, especially after returning from sandy terrain or a field, it is important to take care of the lens frequently. After shooting, it is recommended to clean the lens with a blower and wipe it lightly as needed.
[Rainy season, summer and winter] How to prevent condensation and mold
The hot and humid months of the rainy season and summer, as well as the cold winter months, are seasons when lenses require special attention. The most alarming problem during these periods is condensation and the resulting water burns and mold. When these problems occur on the lens, the photographs taken may appear whitish and fuzzy. Therefore, it is important to pay close attention to maintenance and proper storage to prevent mold. Particular attention should be paid in winter, when the temperature difference between indoors and outdoors is large, and condensation is likely to occur.
Causes of mold formation
Knowing the mold generation process makes it easier to take countermeasures. The main cause of mold is condensation caused by rapid temperature changes. For example, condensation tends to form on the inside and surface of the lens when moving from a place with high temperatures to a place with low temperatures, such as indoors and outdoors, or from a flat area to a highland area.
If this condensation remains on the lens for a long period of time, it will form a whitish stain (water stain), and if dust adheres to the lens, it will become “burnt”. If left in a burnt state, mold will eventually grow.
It is very difficult to restore a lens to its original condition after mold has grown, and in many cases it is necessary to replace the lens. Therefore, prevention of mold directly affects the life of the lens.
To prevent mold
To prevent the occurrence of mold, pay attention to temperature changes and how lenses are stored.
First, it is important to avoid sudden temperature differences. When moving from a hot to a cold place, do not remove the lens immediately. Instead, leave the lens in its case or pouch and allow it to acclimate to the ambient temperature for a while before removing it. This will prevent condensation from forming on the lens surface or inside.
Particular care should be taken when shooting in cold weather or in the mountains. When moving from a hot place to a cold place, a lens heater can be used. Lens heaters keep the temperature of the lens constant and prevent condensation.
It is also important to store lenses in an appropriate manner. As mentioned earlier, make sure to keep just the right amount of humidity by properly using a storage unit or desiccant.
In addition, regular maintenance is essential. In addition to cleaning the lens after use, even if you do not use it much, touch it regularly to change the air in the lens as mentioned above.
Photographing locations to be careful of
Depending on the shooting location, there may be times when care must be taken with the lens. Here we will take a closer look at shooting locations that require special attention and the measures to be taken.
Waterside, ocean, and winter mountains
Shooting in natural environments such as waterside, ocean, and winter mountains is attractive, but the conditions can be harsh for the lens.
First, when you return home after shooting, extend the lens barrel to its fullest extent and wipe the entire lens carefully. At this time, use a lens cloth and carefully wipe all details such as joints and grooves. Afterwards, it is important to dry the lens thoroughly before storing it.
In particular, after shooting in the ocean, seawater may adhere to the lens as droplets, and the salt content may damage the lens. Therefore, do not neglect to wipe it off carefully.
After shooting in winter mountains, be careful of condensation. Because of the sudden temperature change that occurs when returning to a warm room from a cold place, leave the lens in the lens case for a while to allow it to gradually acclimate to the room temperature before cleaning.
Playgrounds and beaches
When shooting in sandy or dusty environments such as playgrounds or beaches, fine particles can easily get into the crevices of the lens.
After shooting in such places, it is important to first use a blower to thoroughly blow away dust and sand from every detail. Pay particular attention to areas where sand grains tend to accumulate, such as around the zoom and focus rings and the lens mount.
After cleaning with a blower, carefully wipe up the lens according to normal cleaning procedures. It is important to check carefully to make sure that no grains of sand remain. Wiping the lens with sand grains remaining may scratch the lens surface or moving parts such as the zoom ring.
When shooting on sandy beaches or other dusty environments, it is recommended to avoid changing lenses as much as possible and to use the minimum amount of equipment necessary.
Choose a lens with fluorine coating or moisture-resistant construction
A fluorine coating is a water- and oil-repellent coating applied to the lens surface. This coating makes it difficult for water droplets, fingerprints, dust, and other contaminants to adhere to the lens surface, and even if they do adhere, they can be easily wiped off. It is especially reliable when shooting in rainy or humid environments.
In addition, lenses with moisture-resistant construction are designed to prevent water droplets from penetrating into the lens. This reduces the risk of a small amount of rain or water droplets entering the lens. However, since it is not completely waterproof, a rain cover should be used in bad weather conditions.
TAMRON Lens Inspection Service [Register as a member to save money!
TAMRON offers the TAMRON Lens Inspection Service to ensure that customers can use their lenses comfortably and for a long time. In this service, our experienced and professional staff will inspect the operation of your TAMRON lens, clean each part, and even update the firmware.
Discounted repair prices according to membership rank
In addition, if you register for TAMRON's membership service “TAMRON ID”, you can take advantage of members-only discounts on repair fees in the event that a problem occurs with your favorite TAMRON lens. Please take this opportunity to register to ensure that you can use your TAMRON lenses for a long time with peace of mind.
Let's use your lenses with care for a long time with proper maintenance!
Daily maintenance is indispensable to take good care of your lenses for a long time. By regularly taking care of your lenses as described in this article, you will be able to maintain their performance over the long term and continue taking photographs as you wish. If you should notice anything wrong with your lens, consider using the manufacturer's maintenance service.


![[Spring] How to prevent pollen and yellow sand [Spring] How to prevent pollen and yellow sand](/article/article_file/file/article-how-to-maintain-camera-lenses/05-en.webp)


