April 25, 2025
[Basics of video shooting] Explaining the basic types of camerawork and dramatic effects!
[Basics of video shooting] Explaining the basic types of camerawork and dramatic effects!
![[Basics of video shooting] Explaining the basic types of camerawork and dramatic effects!](/global/consumer/article_file/file/article-camera-work-basics-types-and-effects/01.webp "[Basics of video shooting] Explaining the basic types of camerawork and dramatic effects!")
If you're just starting out with videography, you may be wondering how to go beyond simply capturing the subject and create a work that resonates with the viewers. One of the important elements for creating professional-looking video works is "camera work." In this article, we'll explain camera work from the basics to advanced applications in an easy-to-understand manner even for beginners.
What is camera work?
Camerawork is the technique of changing the camera's position and angle while filming. Not only still footage, but also moving the camera itself and changing the viewpoint can give the viewer a variety of impressions and emotions.
Camerawork is an important element of video production. Even with the same subject, the impression it gives can change dramatically depending on the camerawork used. For example, slowly approaching the subject can create a sense of tension, while shooting from a bird's-eye view allows the viewer to grasp the overall picture.
Camera work effects
Camerawork is not just a shooting technique, but a way to express emotions and the impression of the image. By choosing the right camerawork, you can convey the message you want to convey more effectively. Here, we will review the effects that camerawork can create.
Adding rhythm and contrast to images
Using the same camerawork over and over again can make a video monotonous. By effectively using different camerawork, you can create variety, rhythm, and flow in your footage.
For example, you can highlight important scenes by creating a contrast between stillness and movement. If you show a scene with a long still camera and then suddenly start moving, the movement will attract attention and create tension.
Also, by moving the camera during a long take, you can naturally guide the viewer's gaze without having to change cuts in the editing. For example, if you capture everyone's expressions while moving slowly around the table in a scene of a family gathering, you can convey everyone's condition without changing the cut.
Enhance the emotion or impression of your subject
* The scene below is an example of how camerawork emphasizes emotions and the subject's impression.
Camerawork has the role of emphasizing the emotions of characters and the impression of the main subject. For example, up and down movement can be used to visually express changes in emotions such as joy and disappointment. If you move the camera from bottom to top at the moment good news is received, the joy and elation will be visually emphasized. Conversely, if you move the camera from top to bottom in a sad scene, the disappointment will be conveyed more impressively.
Varying the speed at which the camera moves can also create the atmosphere of a scene, such as tension or comfort. Sudden movements are effective in expressing tension and impatience, while slow movements are effective in expressing calmness.
Types of Camerawork
Camerawork can be broadly divided into three types: fixing the camera position, moving the camera itself, and using the functions of the lens. By understanding these, you can choose the best camerawork to match the scene you want to shoot and the emotions you want to express.
Fix the camera

Fix is the most basic camerawork style, in which the camera is completely fixed on a tripod or other device. Although it may seem simple at first glance, it is an important technique that forms the foundation of other camerawork styles.
The biggest feature of fix is that it produces stable footage. Because the camera is fixed, the subject's movements and changes in facial expressions can be captured objectively. For example, in landscape photography, the movement of trees swaying in the wind and clouds moving by will stand out more when the camera does not move.
Fix is also suitable for long-term shooting or when you want to maintain the composition. For example, in documentaries and interview shooting, the camera is often fixed so that you can focus on the subject's words and expressions.
Panning: Moving the camera sideways
Panning is a camera technique in which a fixed camera rotates horizontally, and is suitable for following wide landscapes or moving subjects (also called "horizontal pan"). It is effective for shooting subjects that cannot be captured by a stationary camera, such as a magnificent mountain range or chasing a running dog.
When panning, you need to adjust the speed of the horizontal movement. Especially when using a telephoto lens, even a slight movement of the camera can appear to move significantly on the screen, so it is important to move slowly. Note that if you move too quickly, the image will become blurred and difficult to see.
To achieve smooth movement, it is important to make sure that the tripod head is properly adjusted and to operate at a constant speed. The idea is to decide the start and end points of the movement and move at a constant speed between them.
Panright and Panleft
There are two types of panning: "pan right" and "pan left" depending on the shooting direction. Each gives a different impression, so it is good to be aware of how to use them depending on the purpose.
Pan right is a panning shot to the right, and is suitable for capturing subjects moving from left to right or scenery that continues to the right. On the other hand, pan left is a panning shot to the left, and is used for subjects moving from right to left or scenes where scenery spreads to the left. It is used
when you want to convey the movement of the viewpoint or the spread of the scene by moving the camera from side to side. By moving the camera as if to follow the movements of the characters, you can create a sense of realism and speed. In addition, panning to look over a vast landscape or cityscape can express a sense of scale and the spread of space. It is also effective in naturally guiding the gaze to show the flow of the story and the relationships between the characters.
Tilt the camera vertically
Tilt is a camera technique in which a fixed camera moves vertically, and is suitable for tracking tall subjects or vertical movement (also known as "vertical pan"). It is effective when you want to dynamically show a long vertical subject, such as a full view of a building or flowing water. It is also used when you want to show a person's entire body from the feet to the head.
Sudden tilts make the image difficult to see, so unless there is a specific intention, it is best to operate at a slow, constant speed. If it is too fast, the viewer may not be able to follow the image and may feel uncomfortable. Aim for smooth movements, unless you are intentionally trying to express confusion or agitation.
Tilt up and tilt down
There are two types of tilt: tilt up and tilt down. Each has a different psychological effect, so it is best to use them according to the image you want to express.
Tilt up is a movement of raising the camera from bottom to top, and is used when you want to emphasize the grandeur and height of the subject. Shooting as if looking up at a skyscraper can express its intimidating and overwhelming presence. It is also effective when you want to express upward mobility and hope, such as the protagonist's growth or the moment he overcomes difficulties and succeeds.
Tilt down is a movement from top to bottom, and is effective in leading the eye from a bird's-eye view to details, and expressing a sense of falling or closure. It is also used in scenes where the eye is led from a panoramic view of the city to a specific building, or when suggesting the end of a story.
Camerawork that involves moving the camera
Camerawork that moves the camera itself creates more three-dimensional and realistic images. It can convey the dynamism of movement and the breadth of space that cannot be expressed with a fixed camera.
To get authentic images, it is ideal to use equipment such as sliders, dollies, and gimbals. These equipment stabilize the camera movement and reduce camera shake. If you are a beginner, it is a good idea to start with an affordable slider or gimbal.
"Tracking" - Following a subject

Tracking is a technique where you film a moving subject while moving sideways, and is often used in scenes where people are walking or running. You can shoot from the side of the subject as they walk through the city, or follow a running athlete. It is also often used in documentaries and sports footage.
By moving while maintaining a constant distance from the subject, the background will flow, emphasizing the subject's movement. In professional video production, equipment such as rails, sliders, and stabilizers are used.
Camera zoom "Dolly shot"
Dollying is a camera technique that moves back and forth relative to the subject, creating a natural sense of perspective. It is often used in scenes that express the emotions of people or emphasize emotional ups and downs.
Changing the sense of distance from the subject can encourage the viewer to empathize with the subject or express psychological distance. For example, in a scene where tension is building, you can slowly approach the subject to attract the viewer's attention. For a full-scale
dolly shot, a dolly or special rail is used, but a slider or gimbal can also be used as a simple substitute. If you can stabilize the camera even with handheld shooting, you can create a simple dolly effect.
Dolly in and dolly back
Dollying in is a camera technique that moves closer to the subject, and is effective for drawing attention to the subject and creating tension or intimacy. Dollying back is a camera technique that moves away from the subject, and is used at the end of a scene, during farewells, or to get an overview of the entire situation.
It is a camera technique similar to a zoom, but dollying changes the distance from the subject by moving the camera itself, giving a more natural impression. The sense of distance to all elements in the frame changes, giving the viewer a more realistic sense of perspective.
A "circle shot" that revolves around the subject
Circle shots are camera movements that move in a circle around the subject, emphasizing the subject's presence. Also, by capturing the subject from every angle, 360 degrees, it creates a three-dimensional impression. This technique is often used in important movie scenes and music videos. It is also effective when you want to convey the whole picture of an object to the viewer, such as in artworks or product introductions. Circle shots are performed using circular rails or gimbals. Shooting handheld is difficult and requires skill.
Lens "zoom"
Zooming is a camera technique that adjusts the distance to the subject by changing the focal length of the zoom lens without moving the camera body. Since you can enlarge or reduce the subject while keeping the camera fixed, it is an easy camera technique to try even for beginners.
However, it is important to note that it can be difficult to convey a sense of perspective and can often give a flat impression. To create a more realistic feeling, camera techniques that physically move the subject, such as dollying, may be more effective.
Zoom in and out
Zooming in is a way to gradually make the subject appear larger, which is effective for emphasizing the main subject or directing the eye to details. Specifically, this is useful when you want to focus on a specific person or object in a wide landscape.
Zooming out makes the subject appear gradually smaller, gradually revealing the entire surrounding environment or situation. By showing only a specific subject at first and gradually pulling away, you can show the situation or environment in which the subject is placed.
In addition, to use zoom effectively, be aware of the speed of the zoom. Depending on the speed, you can express tension and the passage of time. For example, a sudden zoom is effective in scenes of shock or surprise. On the other hand, a slow zoom can emphasize calm emotions and gradual changes.
Differences in impression depending on the "angle"

Angle refers to the direction or angle at which the camera is held. Even with the same subject, the impression it gives can change dramatically depending on the angle from which it is shot. For example, shooting from an upward angle can emphasize dignity and strength, while shooting from a downward angle can give a weak impression or a bird's-eye view.
Low angle and high angle
Low-angle photography is a technique in which you shoot a subject from below, looking up at it, and has the effect of emphasizing the size and presence of the main subject. For example, shooting a building or person from below looking up at it will emphasize its height and strength.
On the other hand, high-angle photography is an angle in which you look down on the subject from above. It has the effect of emphasizing the subject's weakness and capturing the whole picture from a bird's-eye view. For example, shooting a person from above can emphasize their small and weak impression, which is effective in expressing the weakness and helplessness of a character in a difficult situation. It also has the advantage of making it easier to grasp the whole picture when shooting a wide area or a large number of people.
Dutch Angle
The Dutch angle is a technique in which the camera is intentionally tilted to express instability, tension, and a confused psychological state. The tilted horizon gives the viewer a sense of discomfort, creating an abnormal or dangerous situation. For example, it is sometimes used in suspense and horror movies, where the protagonist falls into a confused or dangerous situation.
However, if the Dutch angle is used too much, it can tire the viewer and weaken the impression of each shot, so be careful when using it. By considering its position in the overall video and incorporating it effectively, you can create a more impactful expression.
Applied techniques to make the most of camerawork effects
Once you have mastered the basic camera techniques, the next step is to try to use them effectively to achieve richer expression.
Combining camerawork
Combining multiple camera moves, such as panning to tilting or zooming while dollying, allows for more complex expressions. For example, panning to show the landscape and then tilting up to the subject will naturally guide the viewer's gaze while showing the situation. Also, by dollying in and zooming out, you can change the perspective of the background while keeping the subject the same size.
However, sudden changes in camera work can confuse the viewer and make the footage difficult to watch. When combining camera moves, be sure to keep the direction and speed of the movement consistent so as not to leave the viewer behind. This requires prior practice and simulation.
Be aware of composition
When working with cameras, you can also get well-balanced footage by being mindful of basic composition techniques such as the rule of thirds. Simulate the composition of the beginning and end of a scene and try to frame it smoothly and consistently. Especially when connecting cuts in editing, it is important to plan the composition of the start and end of the movement so that it naturally connects to the next cut.
In addition, leaving some space in the direction of the subject's movement (eye room) can effectively express the direction and spread of the movement. For example, when shooting a person running to the right, positioning the person on the left side of the screen and leaving some space on the right side will give the impression of movement in the direction of movement. Such small details lead to natural and easy-to-see footage.
Shooting with multiple cameras
Shooting simultaneously from different angles and camerawork expands the scope of expression when editing. For example, in an interview scene, shooting from multiple angles, such as a medium shot from the front, as well as a close-up or wide shot from the side, allows you to choose the cut that best suits the content of the conversation. Also, for one-time events or scenes that are difficult to reproduce, shooting with multiple cameras ensures that you get all the shots you need.
On the other hand, when using multiple cameras, try to unify the color tone and exposure to minimize discomfort when switching. This will prevent discomfort caused by differences in color and brightness when switching scenes in editing.
Use a variety of equipment
By utilizing specialized equipment such as gimbals, sliders, and drones, you can achieve professional-like camerawork. For example, a gimbal allows for smooth tracking, a slider allows for accurate linear movement, and a drone allows for aerial photography. Even beginners can create professional-looking footage by using these equipment.
On the other hand, it is also important not to rely too much on equipment and to think about how to express yourself with simple camerawork. Even without expensive equipment, it is entirely possible to create attractive footage with basic camerawork and ingenuity. Rather, pursuing the maximum expression under limited conditions can increase essential creativity. Sometimes, intentionally taking advantage of the camera shake of handheld shooting or deliberately choosing low-tech methods can create an original flavor and atmosphere.
Using TAMRON Lens Utility™
TAMRON Lens Utility allows you to connect TAMRON lenses to a PC or mobile device with a dedicated cable, and allows you to perform various customization functions, including focus operations that are useful for video shooting, and to update your lenses. In particular, the mobile version's Digital Follow Focus (DFF) function allows you to easily and precisely operate and set the focus on the mobile screen without touching the lens. Even if beginners find the complex manual operations difficult, using software like this will enable them to create advanced images.
Related page : TAMRON Lens Utility™
How to choose the right lens for videography
Choosing the right lens is also important for video production. Here we will explain how to choose the right lens for video shooting.
Maximum aperture
Lenses with small maximum F-numbers, such as F2.8 or F4, can take in a lot of light, which has the great advantage of making it easier to capture bright images even in dark places. Even at dusk or in an indoor environment with only natural light, a lens with a small maximum F-number makes it easier to capture beautiful images without additional lighting.
In addition, lenses with small maximum F-numbers can make use of large bokeh in images, separating the subject from the background for a more impressive effect. This is particularly beneficial for portraits and scenes that express strong emotions.
Focal length and angle of view
Wide-angle lenses (approximately 35mm or less) can express the expanse of space, making them suitable for shooting in small spaces, landscapes, and action scenes. Because they can be shot with a wide angle of view, they make it easy to capture the entire subject even indoors or in small spaces, and the emphasis on perspective allows for dynamic video expression.
Standard lenses (approximately 50mm or less) provide a natural angle of view and perspective close to the effective field of view of the human eye, making them suitable for everyday scenes and documentaries. They are useful for videos that emphasize storytelling and documentaries that want to preserve a natural atmosphere.
Telephoto lenses (approximately 80mm or more) have the effect of capturing distant subjects in a large size while compressing the sense of distance from the background, making them suitable for portraits and interviews. Another feature is that they make the distance between the subject and the background appear shorter, making it easy to create dynamic compositions that make effective use of the background. They are also suitable for video expression that makes use of background blur.
Look
Look refers to the overall appearance, atmosphere, and texture of the image. Specifically, it refers to the worldview and impression of the image that the viewer feels through the screen, such as color grading, brightness, contrast, sharpness, and tone. This look cannot be judged by technical specifications alone, so the most reliable way to judge it is to check the actual image. Also, using lenses from the same manufacturer will result in a uniform image.
Focus Breathing
* Sample video with reduced focus breathing
Focus breathing is a phenomenon in which the angle of view changes slightly when changing the focus. It is said that this phenomenon is particularly likely to occur with lenses designed for photography. It is less of a problem in photography, but it is easy to feel uncomfortable when shooting video because the focus is frequently shifted. It is a good idea to try it out yourself if possible, or check the degree of focus breathing in reviews or test videos.
Axis misalignment and focus misalignment when zooming
The misalignment of the optical axis between the wide-angle and telephoto ends of a zoom lens is called "optical axis misalignment." If the optical axis misalignment is large, the subject may move from the center of the screen during zoom operation, giving an unnatural impression.
In addition, the shift in focus due to the focal length of a zoom lens is called "out-of-focus." For example, after focusing on the wide-angle side, the focus shifts when zooming to the telephoto side. This is not a problem when taking photos if you adjust the focus each time, but it can be a problem when zooming while shooting video.
Thus, when using a lens for photography, it is important to check the amount of focus misalignment caused by changes in zoom.
TAMRON is promoting the improvement of AF performance when zooming when shooting video and still images (using AF-C) by updating lens firmware.
Operability of focus ring etc.

Also check the ease of operation, such as the resistance and smoothness of the focus ring, and the smoothness of AF/MF switching. If you plan to use manual focus a lot, we recommend a focus ring that has a moderate resistance and rotates smoothly. It is also a good idea to check that the direction of focus rotation matches what you are accustomed to. The
smoothness of AF/MF switching is also an important point. If you will be switching frequently while shooting, you should also take into consideration the position of the switch, the feel of operation, and the sound it makes when switching.
Weight and compactness
For long periods of handheld shooting, a lightweight, compact lens makes it easier to maintain stable camerawork. The weight of the lens is particularly important for handheld shooting without a gimbal or long documentary shoots.
In addition to weight, lenses that are easy to handle are useful for shooting from a variety of angles and positions. For example, for shooting while traveling or vlogging, a compact lens that allows you to shoot quickly even in tight spaces will be easy to use.
Moisture-Resistant Construction
Lenses with a Moisture-Resistant Construction are easier to use for shooting near water, expanding the scope of photography. For example, you can shoot safely in situations where there is a risk of contact with water, such as shooting on the beach, landscapes after the rain, or scenes with flowing water. When shooting outdoors, you may encounter unexpected bad weather, so a weather-resistant mechanism gives you peace of mind when taking pictures.
Autofocus (AF) performance
When shooting video, make sure the AF drive is quiet and smooth. Also, moving subject tracking performance is an important point for smooth and accurate focusing. In particular, when capturing unpredictable movements such as sports or children, a lens with high AF performance is easy to use.
Vibration Compensation
Handheld shooting is prone to camera shake, so a Vibration Compensation mechanism makes it easier to take stable shots. This is particularly effective when using a telephoto lens or shooting while moving, as camera shake is likely to occur. On the other hand, when using a tripod or taking panning shots, turning it off may result in more natural footage, so be sure to check how to switch it on and off.
Create the scene you envision with camera work
Camerawork is not just a shooting technique, but an important means of expression for conveying emotions and impressions to the viewer. We recommend that you start with basic camerawork such as fix, pan, and tilt, and gradually expand your repertoire. In addition, lens selection is also an important element in making the most of camerawork. Check out sample images and depictions to choose a lens that best suits your tastes.

Lens Featured in this Impression
-
-
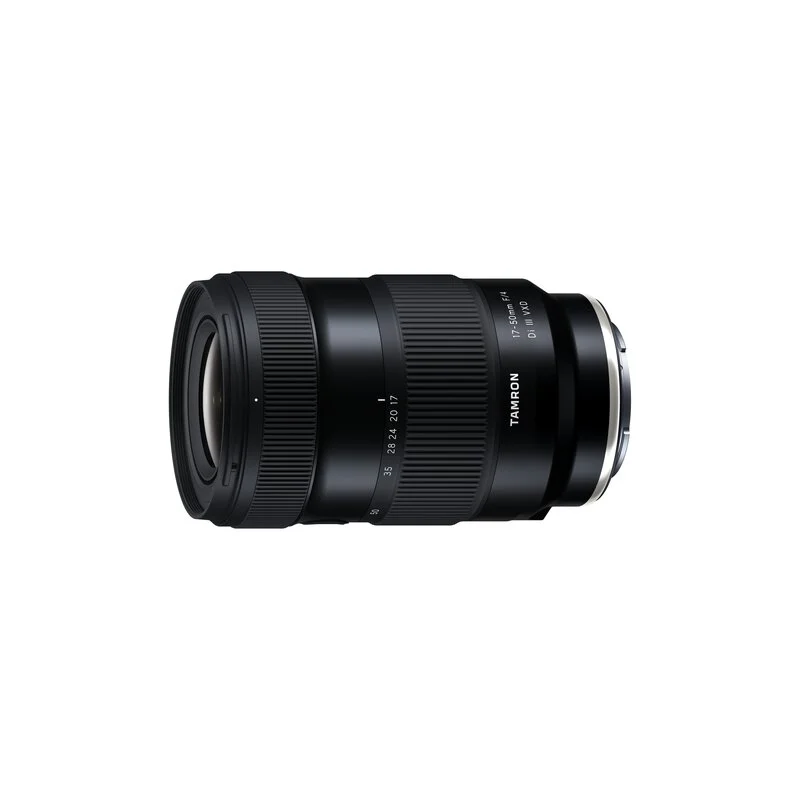
17-50mm F/4 Di III VXD a068(Model )
It's the world’s first lens covering from ultra wide-angle 17mm to the standard 50mm focal length. The highly-compact TAMRON 17-50mm F/4 Di III VXD (Model A068) for Sony E-mount full-frame mirrorless cameras offers maximum versatility for still and video creators. From landscapes to living rooms, this lens captures all that you see.
-

-
20-40mm F/2.8 Di III VXD a062(Model )
The 20-40mm F/2.8 Di III VXD (Model A062) is a new large-aperture standard zoom lens that thoroughly pursues portability. While covering the range from the ultra-wide angle of 20mm to the standard range of 40mm, it is the smallest and lightest in its class. It also offers high image quality throughout the entire zoom range, making it useful not only for still image shooting but also for video recording such as vlogging. The VXD, which is quiet and agile, achieves high-speed, high-precision autofocusing. It is a new, unprecedented large-aperture standard zoom lens that allows users to easily enjoy taking out and shooting both still and video.
-

-
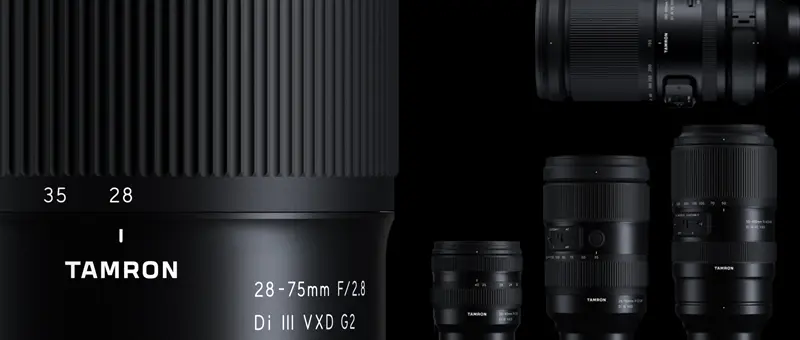
28-75mm F/2.8 Di III VXD G2 a063(Model )
Product Page | 28-75mm F/2.8 Di III VXD G2 (Model A063) is the second-generation fast-aperture standard zoom lens for Sony and Nikon full-frame mirrorless cameras, offering significantly improved optical and autofocus performance and new function customization.
-
-
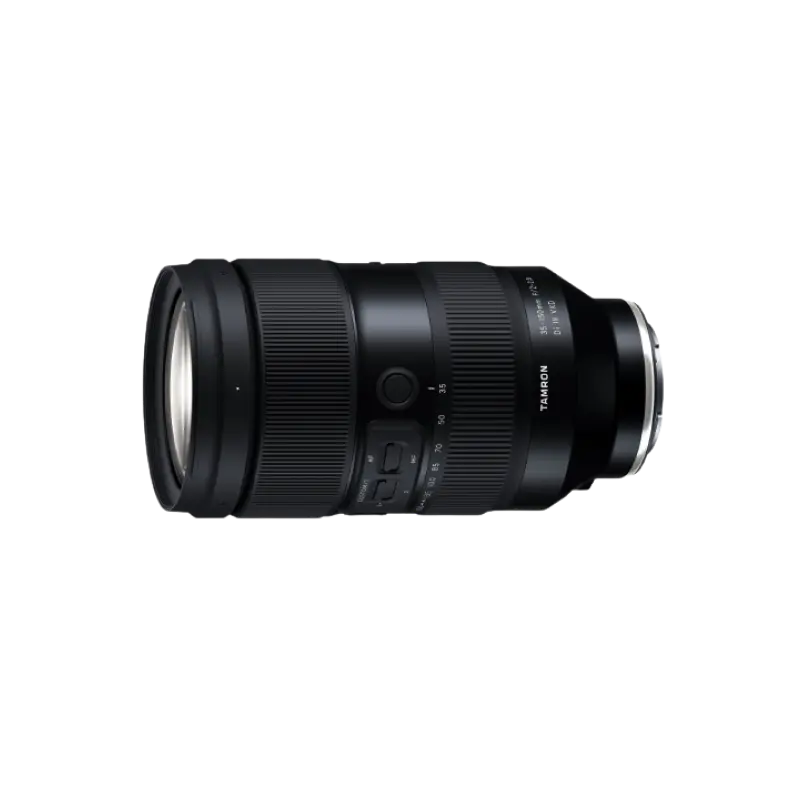
35-150mm F/2-2.8 Di III VXD a058(Model )
The 35-150mm F/2-2.8 Di III VXD (Model A058) is a high resolution travel zoom lens that covers everything from the 35mm wide angle to the 150mm telephoto focal length, the first zoom lens achieving an aperture of F2 at the wide angle end. It has a groundbreaking fast-aperture and utilizes the linear motor focus mechanism VXD (Voice-coil eXtreme-torque Drive), thereby achieving high speed, high precision autofocusing. The innovative lens design enabled us to greatly improve the lens's grip and functionality. The software, developed in-house, enables to easily customize functions and to update firmware.
-
-
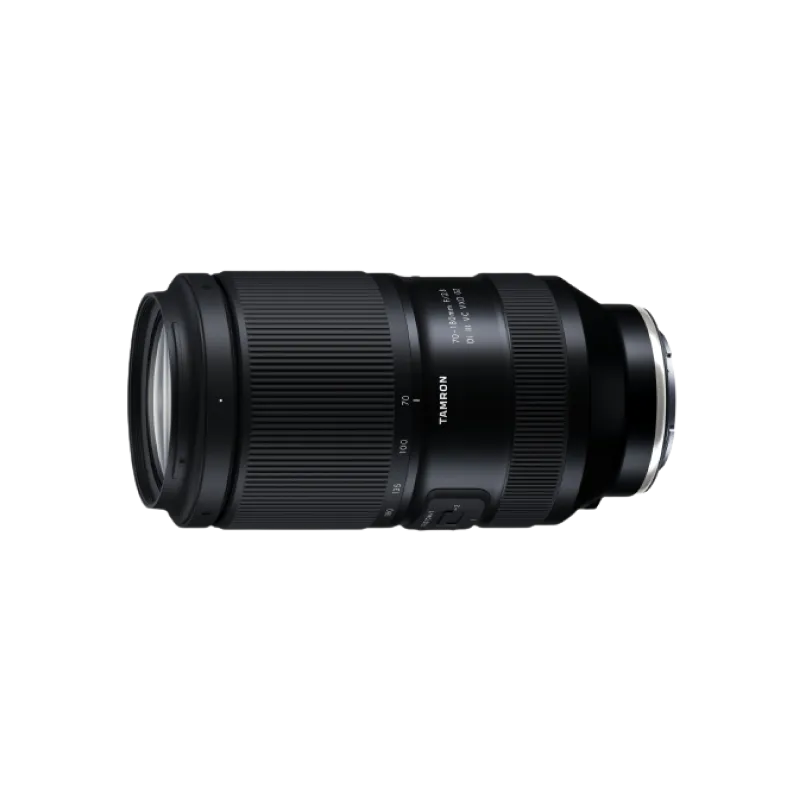
70-180mm F/2.8 Di III VC VXD G2 a065(Model )
70-180mm F/2.8 Di III VC VXD G2 (Model A065) has evolved to G2 level.This is the world’s smallest and lightest, fast-aperture telephoto zoom lens for Sony E-mount with astounding portability and superb image quality.